Sometimes some pages of your website should be moved or deleted. But, if you do this, users may see a 404 error that will prevent them from accessing your content.
The absence of redirects compromises the user experience: your visitors are therefore likely to leave your site, since without redirection, they will not find the content they had come to seek. Thus, you lose leads and/or customers.
In addition, if your site has too many 404 errors, the crawl budget allocated to your site by Google robots is wasted, since they cannot easily browse your pages via the internal network.
Fortunately, redirects 301 exist. By adding a 301 redirection for the prompted or deleted pages in WordPress, users (and search engines) will be transported to the new URL updated, allowing fluid and efficient navigation from one page to another.
In this article, we will explain what the redirects are 301 and under what circumstances you might want to use them. Then, we will show you how to create a 301 redirection on WordPress according to the amount of redirects you want to set up.
If after reading this article you find the process too complicated or you are running out of time, do not hesitate to Contact Churchill, WordPress expert agency To make redirects 301 as part of a maintenance, a redesign or a WordPress site creation.
What is a redirection in WordPress?
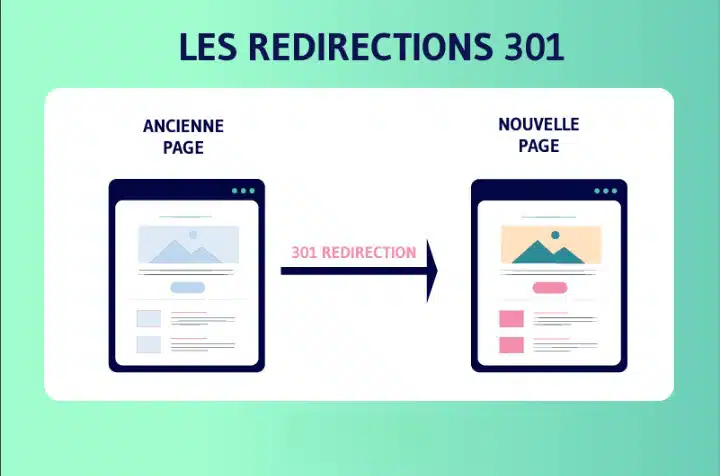
Redirection is a way for your website to automatically send users to a new address when the page they want to visit has been moved or replaced. It's like you move and want your mail to be sent to your new address.
There are different types of redirects identified by numbers such as 301 (Moved permanently)302 (Found / Moved Temporarily) or 307 (Redirect temporal) and many others, all starting with the number 3.
Each type of redirection automatically the user's web browser to a different URL when it tries to visit a page that does not exist, or that you only want the user to visit.
To have an overview of the different redirects, here is a brief description of the 3xx response status status code associated with each main type of redirection:
- Redirection 302: URL / resource has been moved temporarily. It is therefore essential to monitor the displacement of resources and to change the response status code in 200 on the initial URL once the content has been relocated to the latter.
- Redirection 303: Here, the response status code indicates to the user that the resource initially located on the URL can be found on another page of the site.
- Redirection 307: Like redirection 302, the request code 307 indicates that the resource has been moved temporarily. The difference lies in the fact that redirect 307 forces the customer to use HTTPS rather than HTTP when he makes a request.
But here we are going to focus on 301 redirects, which are probably the most important but also the most frequent. They tell the browser that the content of the page has been moved permanently to the new location (URL) and that you do not intend to move it again.
When do you need to set up a 301 redirect on WordPress?
The first reason to use a 301 redirection is when your site or a page of your site has been moved, and you want to direct the user to a new page. Redirection is also necessary when you plan to modify the permalian of an article or a page.
If you do not configure redirection, your users will see a 404 error. This gives the user a bad experience and can have a significant impact on the referencing of your WordPress site.
This internal network with broken links can not only encourage your visitors to leave the site, but also prevents Google robots from logically browser and easily understand the structure. As the latter have a budget allocated to your site, so they are likely to come and visit it less regularly, which will not help improve your SEO.
You can also lose precious backlinks if there are a lot of broken links on your site. This will result in a significant drop in the authority of your field and the classification of your keywords in the SERP. This is why the 301 redirects are essential in order to keep your “SEO juice” (authority, popularity) transmitted by backlinks pointing to the pages of your field. Thus, your natural referencing will not be negatively impacted.
Redirects allow you to indicate to the search engines and your users that the page they are trying to reach has been moved permanently to a new location. In this way, all the traffic and links of your old page (301) are transferred to the new page (200).
Now that you know what a 301 redirection is and why it is useful, let's take a look at its implementation. Whether you are a beginner or not with WordPress, there are several methods for performing 301 redirects:
Method #1: Use a redirection plugin
This first method is probably the simplest to set up. You can use a WordPress redirection plugin To simplify your task. For example, the premium version of Yoast SEO does the job very well. But, even better, there are free plugins.
For example, the “redirection” plugin is ideal for setting up a 301 redirect in terms of your pages. Concretely, redirect your site.com/ancienne page to your site.com/nouvelle page.
For redirections to the domain level, it is preferable to use the .Htaccess method that we will present to you in the next part.
To start, install and activate the plugin from your site. Then go to Tools -> Redirection to launch the plugin configuration assistant.
Once the installation is complete, click on the “Addirection” button in the “Redirection” tab to create your first redirection.
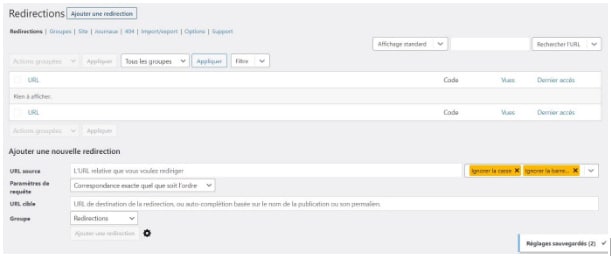
You will then see four fields to fill out:
- URL Source : Enter the original URL you want to redirect. In other words, when someone visits this page, the redirection is applied and the user is redirected to another page.
- Request parameters : Leave the default settings.
- Target URL : This is the new URL to which you want to redirect visitors.
- Band : This option allows you to organize all of your redirects. You can leave it by default, or assign a group to a set of redirects: for example, if you redirect product pages from a specific category, you can create a “products” group to find your redirects more easily if necessary.
Then click on add a redirection to complete the configuration. If the redirection is not yet active, empty your cache and it should be displayed properly.
Others WordPress plugins Exist if you want to make your redirects easily: for example, you can opt for simple 301 redirects, Really Simple SSL, Safe Redirect Manager, All in One SEO, Quick Redirects, simple Redirect Website, SEO Redirection and many others.
Method #2: Create a 301 redirection using the .htaccess file
If you want to avoid installing another plugin, you can also create 301 redirects manually. This method of redirection is particularly relevant when you want to apply redirects on many pages, or redirects relating to the whole of a subdossary of your site.
Since this implies modifying certain sensitive files, we advise you to save your website beforehand.
To start, you will need to connect to an FTP customer, like Filezilla for example, or to the file manager of your host. Then look for the .htaccess file.
Once you have located this .htaccess file, you will have to modify it with a few lines of codes to stick to make redirects 301 effective, depending on what you want to do:
.htaccess for an article or a page alone
Redirection 301/Ancien-url https://votresite.com/nouvelle-url
Paste the code above in your .htaccess file and replace the URLs with yours: the redirection will be applied.
Churchill's advice: Check that the new URL has the right protocol (HTTP/HTTPS).
.Htaccess for an entire website
Rewritecond %{http_host} ^anciendomaine \ .com $ [OR]
RewriteCond %{http_host} ^www \. Aciesndomaine \ .com $
Rewritule (.*) $ Https://www.nouveaudomaine.com/UM1 [R=301,L]
Paste the code above, composed of Regex (Regular Expressions), in your .htaccess file and replace the values ancient And New Domaine by the corresponding domain name.
Churchill's Council : also check that the new values inscribed in your .htaccess carry correct domain extensions (TLDS), that is to say .com, .fr, .org, .net, etc.
As you can see, redirects 301 indicate to search engines that the requested page or article has been moved permanently or replaced, and send visitors to new content. Using one of these 2 methods, you will therefore be able to redirect all of your pages (or your entire site) to a new active URL.
However, keep in mind that any type of redirection is only useful when implemented correctly. So always watch your site to detect 404 errors and do not hesitate to come back to this article whenever you need it.


