
You used the WordPress CMS to create your website ? You have probably already installed Google Analytics. However, this is not enough: indeed, Google Analytics does not allow you to follow conversions on your WordPress website. This is when Google Tag Manager (GTM) finds all its use. Indeed, GTM will allow you to follow, with precision, what your visitors do on your website. In this article, we will detail, step by step, how to install Google Tag Manager on your WordPress site in two different ways: using a plugin or manually for the most daring. Let's go!
Google Tag Manager (GTM), what is it?
Google Tag Manager (GTM) is a free Google tool that allows you to add, update and manage code extracts, called tags, on your WordPress site.
Website owners often need to add several code extracts to follow their conversions, form submissions, clicks on links and collect other analytics data. With Google Tag Manager (GTM), you can easily add and manage all these scripts from a single dashboard.
There are models of integrated tags for Google Analytics, Google Ads, Google Optimize, Woocommerce or Google Adsense. The tags manager also works with several analytics and third -party follow -up platforms.
Now that you better understand the usefulness of using Google Tag Manager, let's see how to install it on your WordPress site using a plugin:
Step 1: Creation of a Google Tag Manager account
To start, go to the Google Tag Manager platform to create an account. Click on the “Start free” button. (You must have a Google account to start).
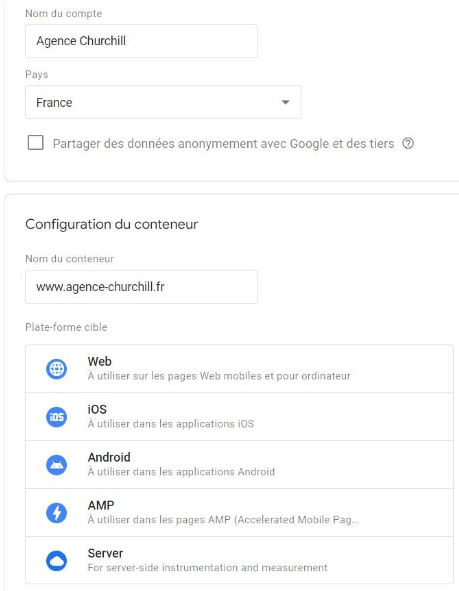
You will be redirected to an account creation page. You will then have to fill several fields:
- Account name: For example, enter the name of your business.
- Your country of residence,
- Container name: Fill in the address of your website. For information, the container is a piece of code (snippet) which will contain all the beacons that you will have created later, with GTM.
- Target platform: This is the platform to which the beacons will be added. For a WordPress site, choose web. Note that you can also use GTM on mobile applications.
When all fields are filled, click the Create button, then accept the conditions of use of Google Tag Manager (GTM).
In the next step, a window appears and GTM will offer you to manually add two code elements:
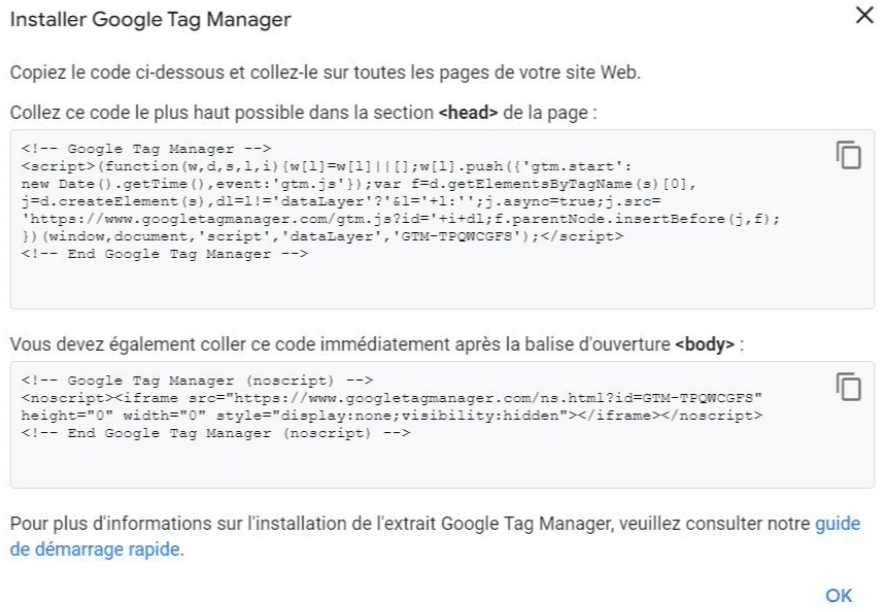
The first code should be integrated into the tag of your page (if possible, as high as possible to optimize the trigger of the GTM tag). The second, in the tag of your WordPress site, just after the opening of the tag.
Do not worry: if you are not sure of yourself, using a WordPress Google Tag Manager plugin will help you perform this task.
Step 2: Installation of the Google Tag Manager plugin on your WordPress site
To install the extension, go to the back office of your WordPress site and add one of the many plugins specifically designed for Google Tag Manager. The most popular extension for this type of task is GTM4WP.

Once the GTM extension has been downloaded and installed, you will need to make two settings in the General Plugin tab:
- The addition of your Google Tag Manager identifier.
- The choice of placement of the code for the second part of your container (container code placement). Remember, this is the famous piece of code that GTM suggested that you insert manually after the tag. By default, our plugin will add it to the footer. It is not recommended by Google, but it will work in most cases.
Finish by clicking on the Save modifications button. Your WordPress site is now ready to receive your first tag.
To start, save your WordPress website (files + database). Many plugins allow you to do so.
Then, don't forget: Google Tag Manager will ask you to install two small code extracts on your website. One must be placed in the tag. The other must be placed in the tag.
All WordPress themes provide us with a hook (a php script) which allows us to write in the tag. It is this hook that is used to write the tag In charge of loading our style sheet, for example. Without this hook, we would not have personalized style for our websites!
But the hook (and the corresponding tool function) allowing you to write just after the tag is only very recent. It is therefore possible that your theme does not integrate it if it has not been updated for some time.
Check if you can place your snippet on your WordPress site
You must first check that your theme allows you to host the corresponding snippet. Everything happens in the Header.Php file. It is in this file that the tag is open. Just check the presence of the function wp_body_open (), or the hook of the same name.
If, just after the opening tag, you find a line like:

So everything is ok, you can graft yourself there to insert the snippet provided by Google.
To insert your code extracts, search for “wp_body_open” and “wp_head”.
In the functions.php file of your child theme, copy and glue the code extracts below between PHP tags ::
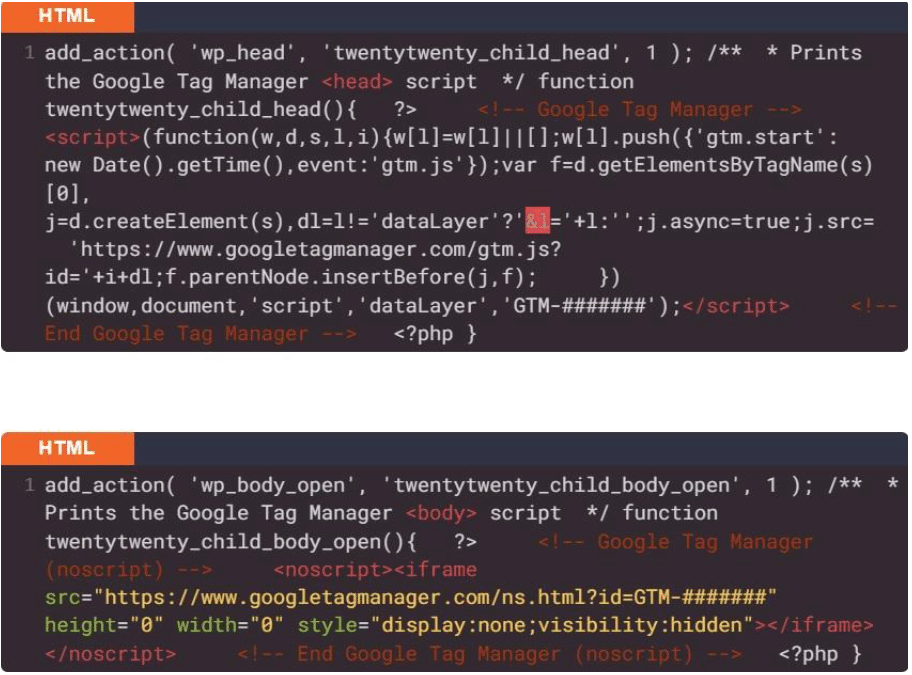
And now, your code extracts are now placed on your WordPress site and you are now ready to follow the conversions on your site thanks to Google Tag Manager.


